 Proper Record Cleaning Can Help You Find Your Own Hot Stamper Pressings
Many of our customers have asked us about our cleaning regimen.
Well, we’ve finally sat ourselves down and written out the bulk of it, with only one step not included for the simple reason that by itself it is responsible — to some degree, an improvement of roughly half a plus, sometimes more — for our Hot Stamper pressings sounding better than other copies even when those copies share the exact same stamper numbers.
Our approach has of course been refined many times over the last twenty-five years. At some point, we had to admit that nothing we could come up with to do differently made any difference to the sound quality of the records we had cleaned, so we stopped experimenting.
The instructions below detail the methods, fluids and hardware we have been using to clean the records that go in our shootouts for more than ten years.
You will need two machines, one for scrubbing and rinsing, using the various fluids we recommend, and another machine with a vacuum arm (threaded or unthreaded) to remove the fluids from the record.
As for the second vacuum machine, we have an Odyssey brand machine (no longer made), but Keith Monks was making a similar machine in the 70s — I know because in 1976 I paid to have my fifty favorite records cleaned on one. (Someday I will post a picture of the customer KMAL sleeve they put the cleaned record in, with a number of boxes, 25?, to be checked off each time the record was played, so that you would know when the record would need to be cleaned again.)
There are a number of Keith Monks machines made for the consumer market which we may have to buy one day when our current Odyssey gives up the ghost. (We have gone through two and have another one headed our way. It’s been money well spent; it would be hard to imagine the business running without these machines or others of the same design. The sound of every record cleaned on this kind of machine is improved, even when just cleaned with water!)
The Keith Monks style machines should work just as well as the Odyssey. Others with the thread design they pioneered will too.
- Place the record on a VPI 16.5 machine or equivalent.
(The 16.5 is a workhorse and ideal for this aspect of cleaning. Note that if you need to clean lots of records, a fan placed under the machine to keep the vacuum from overheating is a must.)
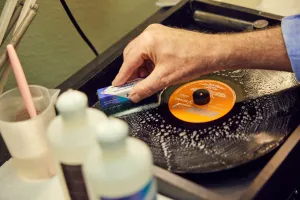
- Apply premade step 1 enzyme solution and spread evenly across the record with the step 1 brush, then scrub back and forth gently with the grooves for a couple of rotations.
Apply all solutions sparingly. Too much will foam over the edges of the record, and will require additional rinsing.
- Vacuum the soap off with the 16.5 tube designated for soap.
- Apply step 2 in the same fashion as step one.
- Vacuum the soap off with the tube designated for soap.
Note that the soap is always vacuumed with one tube and the water with a different one. You will need two 16.5 suction tubes, one tube for water and one for soap.
Make sure to replace the fabric lips around the vacuum slot regularly as they wear out quickly with heavy use. I think we stopped trying to repair them and just buy new tubes, which is the more convenient option.
- Switch to the vacuum tube designated for water, apply step 3 rinse water and vacuum.
- Apply more step 3 rinse water.
- Carefully place the record with water on it onto the vacuum machine (either the Odyssey or any other with a vacuum arm design) and run the vacuum across the record.
- Use a microfiber cloth to wipe any droplets of liquid off the edge of the record after vacuuming is completed.
- Place the now dry record on a basic turntable, set at 45 RPM, and drop the needed on the first track. This will “plow” out any softened material that may be left in the grooves.
- Flip the record over and play the other side.